Thursday, August 27, 2026

DIY Guide: 10D/9N Kazakhstan for less than P60,000 from Manila


 Kazakhstan is honestly one of the best countries to travel to, especially in this economy 😂🇰🇿


Diesel here is only around ₱43 per liter, and almost everything is so affordable—from Uber rides to food and tours.

It’s also visa-free for Filipino passport holders 🇵🇭 and you get to see so much nature in just one country. Some places literally feel like Africa, Italy, Vancouver, and Utah all in one trip. 😂

It also feels like one of the safest and most progressive countries in Central Asia. Even though Kazakhstan is a Muslim-majority country, it’s very secular and doesn’t feel overly religious or conservative. You don’t see that many women wearing hijab either, especially compared to what people might expect from a Muslim country.

The food though… meh 😭😂 Not really a fan of white-people food, so we still ended up eating Chinese food.

But overall, I highly recommend Kazakhstan. Affordable, safe, visa-free, beautiful, and super underrated. 🇰🇿🏔️

Kazakhstan Travel Tips 🇰🇿✈️

1. Book your flights way in advance. I booked mine almost a year ahead and got a round-trip AirAsia ticket for only ₱22,000.
2. Get a window seat! The views on the flight to Kazakhstan are insane—you can see huge mountain ranges from the plane. 🏔️
3. For cooler, pleasant weather, I’d recommend going around late August to October.
4. I booked most of my tours through Getyouguide App
5. For Big Almaty Lake, choose a NO HIKING TOUR. Don’t torture yourself with an 8-hour hike when you can get much closer by car. 😂Check out NeoTours on Instagram for a cheaper option
6. Put rest days between major tours. Kazakhstan tours can involve HOURS of driving, so don’t schedule a full-day tour every single day.
7. Ride the colorful slides in Ayusai! It was only around 1,000 tenge and surprisingly fun. 😂
8. Ride the Kok Tobe roller coaster around sunset for the city view. 🎢🌇
9. The Almaty Museum of Arts is a must if you are cultured.
10. I had trouble getting the OTP for Yandex Go, so I ended up not using it.
11. Download inDrive instead for getting around Almaty.
12. Download Glovo for food and grocery deliveries.
13. Kazakh food wasn’t really my thing—I’m Asian and eventually started craving Asian food 😭😂 But try the plov/rice pilaf. If you’re adventurous, horse meat is also traditional, but I felt bad for the horse so I skipped it. 🐴😭
14. Try a camel milk cappuccino at least once. ☕️🐪
15. If you have a long layover in Malaysia like we did, booking an airport hotel is worth it. Rest instead of suffering in the terminal for hours. 😂
16. If you’re staying in Almaty, I liked the Bostandyk District—just make sure your hotel/Airbnb is close to the places you actually want to visit.
17. Kazakhstan isn’t super English-friendly, especially once you leave the tourist areas. Download Google Translate and the Russian/Kazakh offline languages before your trip.
18 . Keep some cash in tenge, even if you mostly use cards. Small attractions, markets, and stops outside the city can be easier with cash.
19.  Withdraw at least 100,000 tenge for your trip. Some establishments still accept cash only, and you’ll also need cash for tips and some inDrive rides. 💸
20. When shopping at Green Bazaar, don’t just buy from the stalls you see first. Go down to the basement—a lot of the goods are much cheaper there. 😂🛍️
21. When booking the charyn and kolsai lake book an overnight stay to experience living in a yurt. the beds are quite comfortable but the bathroom is clean. But if you want a private bathroom get the more expensive tour if you don’t like shared bathroom.

Sunday, April 19, 2026

🇮🇸 DIY Iceland Trip from Manila for Less Than ₱250,000 (Private Tour)


Northern Lights in Reyjavik


Dog Sledding in Iceland


with my yaya

Iceland's Ghost Town


Alex Private Tour Guide in Iceland


If you’re looking for cheap flights from Manila to Iceland… good luck. Iceland tickets are really expensive.

What I did was I didn’t book Manila to Iceland directly. I looked for the cheapest flight going to Europe instead. I was able to get a business class roundtrip to Italy via Etihad Airways for around €2,000. From there, I just booked flights to Iceland via easyJet from Rome or Milan. That’s honestly my best advice if you want to save money. It was also my first time flying business class since I was traveling with a baby on a long-haul flight—worth it for the comfort.

Iceland is one of the most unique places I have ever been to. This has been a childhood dream of mine, and I’m really glad I got to experience it with my baby, my senior citizen parents, and a yaya.

If you are traveling with seniors, I highly suggest getting a private tour. Iceland is very slippery, and the weather is unpredictable, so it’s better to prioritize comfort and safety. This is not the type of trip na magtitipid ka sa pag DIY. I also don’t recommend renting a car and driving yourself, especially during winter. Roads are very slippery, and if you’re not used to winter driving, it can be dangerous. Hiring a private driver or joining a tour is the best option.

The itinerary that I created was very intentional. We only had 9 days, so I made sure to put rest days in between major tours. Ayoko mapagod. I’d rather enjoy the experience kaysa maghabol ng itinerary.

I booked most of my tours via Viator. I got a private Golden Circle + Blue Lagoon tour for around $1,000 for 4 people—if you’re only in Iceland for a few days, this is the one tour you must book. I also booked a South Coast private tour for another $1,000. It’s a long tour, but you get to see some of Iceland’s best spots like the black sand beach and waterfalls.

I also did the Reykjanes Peninsula tour for around $600. If you’re looking for something closer to Reykjavik, this is a good half-day option with unique landscapes and fewer crowds.

For the Northern Lights, I joined a bus tour from Reykjavik for about $68. Just manage your expectations—it’s really a hit or miss. On our first try, we were so jetlagged and tired that when the guide said the lights appeared, I was literally asleep. When I finally saw it, the sky wasn’t even that clear. I couldn’t see it properly with my eyes—I had to use my phone’s night mode.

My favorite experience was dog sledding near Reykjavik, which cost around $500. That was really worth it. Dog sledding isn’t originally from Iceland—the dogs are imported from Alaska—but honestly, I didn’t care. It’s been a dream of mine, so I booked it without hesitation (and I did this one alone without my parents). It felt like a once-in-a-lifetime experience, especially coming from a tropical country. Imagine driving a dog sled on a frozen lake—hindi siya normal experience. Note that this tour is available all year round, but during summer, you’ll be riding on grass instead of snow.

We stayed in an Airbnb in Reykjavik city center. I’ve heard a lot of reviews that the food in Iceland is not that good, so I just cooked most of our meals. When I got lazy, I ordered from the Aha app Iceland food delivery, which is like their version of GrabFood. You can also order groceries in advance.

Iceland is one of the most expensive countries I’ve ever been to, but also one of the most beautiful. For me, it was worth it.

Private Tour Links: 

Sout Coast Private Tour

Reykanes Peninsual Private Tour

Private Golden Circle with Blue lagoon Tour

Northern Lights Bus Tour

Dog Sledding Tour


Wednesday, February 12, 2025

How to Apply for a DFA Passport for Babies (6 Months and Below) with Your Yaya

Traveling with a baby? Getting a passport for your little one is the first step! Here’s a simple, step-by-step guide to applying for a DFA passport for babies under six months old, especially if you’re bringing your yaya along.


Step 1: Get Your Baby’s PSA Birth Certificate


Since PSA birth certificates are only available six months after birth, you’ll need to request one online. The easiest way is through the PSA Serbilis website:

🔗 https://www.psaserbilis.com.ph/ (Cost: ₱300)


Step 2: Apply Online for a DFA Passport Appointment


Visit the DFA Passport Appointment System:

🔗 https://www.passport.gov.ph/


Since children below 7 years old are considered minors, they are eligible for walk-in applications at DFA Aseana and selected satellite offices. However, booking online ensures a smoother process—especially if you’re applying for your yaya’s passport at the same time.


Step 3: Secure Your Marriage Certificate (if applicable)


If you’re married, you’ll need a PSA Marriage Certificate as part of the requirements. You can request this online via the PSA website.


Step 4: Get Your Yaya’s PSA Documents


If your yaya is traveling with you and applying for a passport as well, she will need the following:

✅ PSA Birth Certificate

✅ PSA Marriage Certificate (if married)

✅ Valid ID


Additional Tip: If your yaya doesn’t have a valid ID, she can apply for a National PhilSys ID (Philippine National ID)online. The process is simple, and she can print a temporary ePhilID, which DFA will accept as a valid ID.

🔗 Apply here: https://www.philsys.gov.ph/


Step 5: Walk-In or Scheduled Appointment?


For babies below 7 years old, DFA allows walk-in applications at certain branches. However, to avoid long lines and ensure a hassle-free process, I highly recommend booking an appointment online. This makes everything smooth sailing—especially when handling a baby!


Bonus Tips for a Hassle-Free DFA Trip


✅ Bring extra copies of all documents (just in case!)

✅ Wear comfy clothes for you and your baby—DFA lines can take time

✅ Pack essentials like milk, diapers, and snacks

✅ Arrive early to avoid crowds

✅ Bring Mom’s valid ID

✅ Bring a toy for your baby to help during passport photo-taking

✅ Wear Semi-Formal Attire, Polo, and Closed Shoes for the passport application

✅ It took us 30 minutes for our application—it’s even faster in satellite offices

✅ Bring ₱150 cash for the LBC delivery fee

✅ You will receive your baby’s passport after 2 weeks


By following these steps, you’ll have your baby’s passport in no time! Ready to explore the world with your little one? Let me know in the comments if you have any questions or need further tips!

Wednesday, October 18, 2023

DIY Safari Bliss: Unraveling Cape Town for Less than ₱150,000 from Manila


After four years stuck at home, I found an unbeatable deal: a roundtrip ticket from Manila to Cape Town for just P35,000 via Singapore Airlines. South Africa, my dream destination, felt like the perfect escape.

I used to think Africa required Small Laude's budget, but Cape Town proved me wrong. It's surprisingly affordable, from restaurants to delightful experiences like my 180-peso wine and cheese tasting at Fairview Wine and Cheese.


Perfect for families, Cape Town's warmth makes it ideal for bonding. Plus, it's budget-friendly without compromising on the fun.

Cape Town's a haven for budget-friendly adventures, from meals to cool wine tastings. Fairview Wine and Cheese was just the beginning.

In my top 3 of 30 countries, Cape Town offers more than wildlife—it's culture, food, and a once-in-a-lifetime adventure.

Cape Town is more than a destination; it's where budget meets adventure. Pack your bags for an affordable escape. It's like Australia, but with safari magic. Ready for the journey? 🌍✈️🦓

Insider Tips:

1.Skip the Safari in Kruger National Park; there are equally amazing ones just a 2-hour drive from Cape Town.

2. Don't want to drive on the "other" side of the road? Rent a private chauffeur via the Viator app for $200 a day. It's a game-changer, trust me.

3. Private safari lodges won't break the bank; they come with full board, including meals and game drives. Plus, consider visiting two lodges for diverse safari experiences.

4. Cape Town's food scene won't empty your pockets; it's cheap and oh-so-delicious. And hey, it's a cashless city—plastic is your best friend.

5. Good news for Manila to Cape Town travelers: no need for a yellow fever vaccine.

Itinerary (Cost in PHP):

  • African Visa Single Entry via VFS: 2,000
  • 50GB Internet for Pocket Wifi: 2,500

Day 1: Depart from Manila

  • Departure: 35,000

Day 2: Arrive Cape Town

  • Hotel for 4 days (P30,000 for 2): 15,000
  • Dinner in Cape Town Waterfront: 1,500
  • Sunset Cruise with Champagne: 900
  • Groceries and Snacks: 5,500

Day 3: Cape Town City Tour

  • Private Chauffer: 5,500
  • Table Mountain Cable Car: 1,200
  • Kirstenbosh Botanical Garden: 300
  • Mocca Museum, Bo-Kaap, etc.

Day 4: Cape Peninsula Tour

  • Private Chauffer: 5,500
  • Chapman’s Peak Drive, Cape of Good Hope, etc.

Day 5: Cape Town Winelands Tour

  • Wine and Steak Lunch at Fat Butcher: 2,000
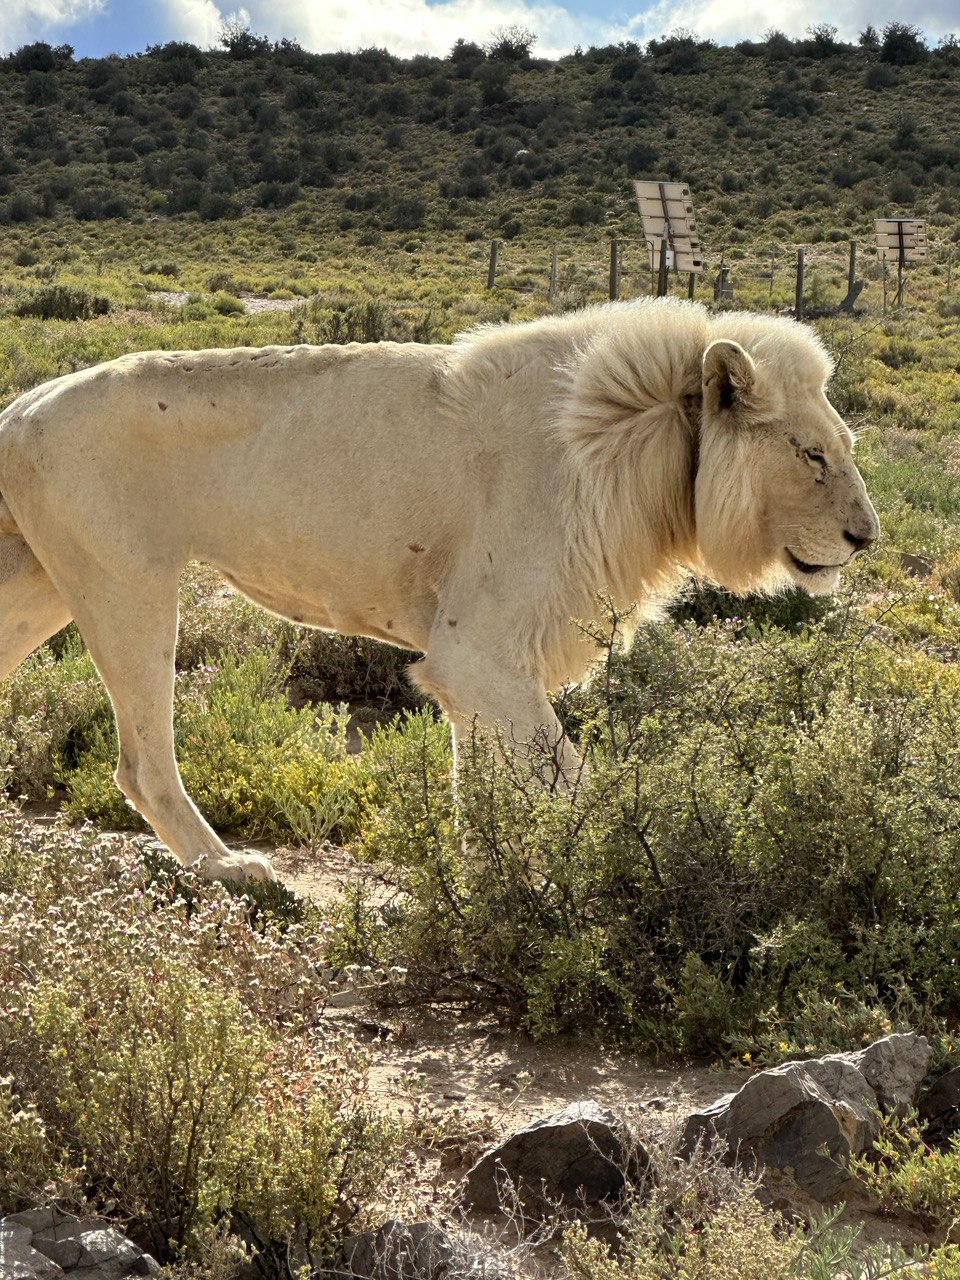
  • Drakenstein Lion Park :350
  • Wine and Cheese Tasting: 300

Day 6-7: African Safari at Aquila Game Reserve

  • Transfer to Aquila: 3,500
  • Aquila Game Reserve (Full Board P30,000 for 2 Pax): 15,000
  • Game Drive,
  • ATV Quad Bike Safari: 700

Day 8-9: African Safari at Buffels Drift Game Lodge

  • Transfer to Buffels Drift: 8,500
  • Buffels Drift Game Lodge (P32,000 with 2 Game Drive for 2): 16,000

Day 10: Buffels Drift to Cape Town

  • Private Transfer: 15,000

Day 11: Check in at Best Western Cape Town

  • With free breakfast and Free Airport Transfer: 5,000
  • Cape Town to Manila

Total Cost: 145,981 PHP

This itinerary proves that a dream safari in Cape Town is within reach without breaking the bank. Pack your bags; the wild awaits! 🦓🌍✈️